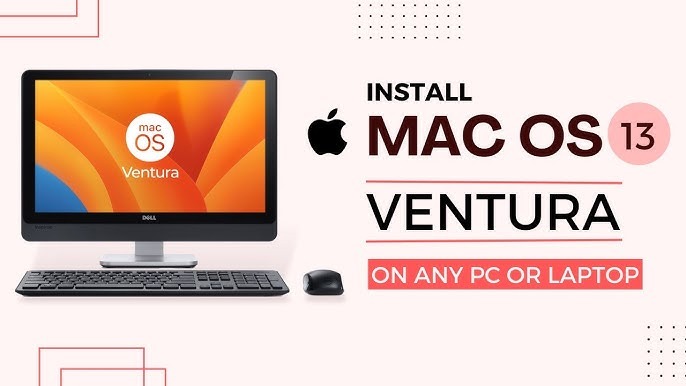
- If you love Apple’s macOS but don’t want to spend a fortune on a MacBook or iMac, you’re in luck! With some effort, you can install macOS 13 Ventura on a non-Apple computer (often called a Hackintosh). Although it can be a bit tricky, following the steps correctly will give your PC or laptop the power of macOS without the Apple price tag.
This guide will walk you through everything you need to know to install macOS 13 on your PC or laptop. Keep reading for easy, step-by-step instructions and some tips to make the process as smooth as possible.
Table of Contents
ToggleA Few Warnings Before You Start
-
- Compatibility Issues: Not every PC or laptop is compatible with macOS. You need to check if your computer parts (like CPU, graphics card, etc.) work well with macOS.
-
- Patience Required: This isn’t a one-click setup. You’ll need to follow some technical steps carefully.
-
- Not Official: Apple doesn’t officially support macOS on non-Apple hardware. So, you won’t get updates or customer support if anything goes wrong.
If you’re ready to take the plunge, let’s get started!
System Requirements for macOS 13 Ventura
Before you begin, make sure your PC or laptop meets these basic requirements:
-
- CPU: Intel Core i5 or i7, or newer AMD Ryzen chips (macOS works best with Intel CPUs).
-
- RAM: At least 8GB for smooth performance.
-
- Storage: 64GB of free space (SSD is recommended).
-
- Graphics: A supported integrated GPU (like Intel UHD) or a compatible discrete graphics card.
-
- Boot Mode: Your PC should support UEFI boot.
Also, you’ll need some tools and software:
-
- A 16GB USB drive
-
- macOS Ventura installer (we’ll show you where to get it)
-
- OpenCore Bootloader (we’ll cover this later)
-
- Internet access
Step-by-Step Guide: Installing macOS 13 Ventura on a PC or Laptop
Step 1: Back Up Your Data This installation process may erase everything on your hard drive, so it’s better to back up important data before you begin. Save your files to an external drive or cloud storage to avoid any loss.
Step 2: Create a macOS Installer USB
To install macOS on your PC, you need a bootable USB drive with the macOS installer. Here’s how to prepare it:
-
- Get macOS Ventura Installer:
You can download the macOS Ventura installer from the Apple App Store on a Mac. If you don’t have a Mac, search for a trusted Hackintosh community site like Olarila or tonymacx86 to download the file.
- Get macOS Ventura Installer:
-
- Format the USB Drive:
-
- Plug your USB drive into a Mac or Windows computer.
-
- Format it as macOS Extended (Journaled) with GUID Partition Map (you can do this in Disk Utility on Mac or Rufus on Windows).
-
- Format the USB Drive:
-
- Transfer the macOS Installer to USB:
-
- On a Mac, use Terminal to copy the macOS installer to the USB drive:
-
- Transfer the macOS Installer to USB:
bash Copy code
sudo /Applications/Install\ macOS\ Ventura.app/Contents/Resources/createinstallmedia –volume /Volumes/YourUSBName
On Windows, use tools like TransMac to transfer the installer.
Step 3: Install OpenCore Bootloader
The OpenCore Bootloader is essential to boot your PC or laptop with macOS.
-
- Download OpenCore Bootloader from the official site or trusted forums.
-
- Install OpenCore on the same USB where you put the macOS installer:
-
- Extract the OpenCore files.
-
- Copy the EFI folder to the USB drive’s root directory.
-
- Install OpenCore on the same USB where you put the macOS installer:
-
- Modify the Config File:
OpenCore needs to be configured to match your hardware.-
- Edit the config.plist file using a tool like ProperTree or OpenCore Configurator.
-
- Add your hardware specifications to the config file to avoid boot errors.
-
- Modify the Config File:
Step 4: Change BIOS Settings on Your PC/Laptop
Your PC’s BIOS needs some changes to boot macOS smoothly.
-
- Restart your PC and enter the BIOS setup by pressing a key like F2, F12, or DEL (depends on your motherboard).
-
- Enable UEFI Boot Mode.
-
- Disable Secure Boot and Fast Boot.
-
- Set USB Boot Priority so your PC boots from the macOS USB installer first.
-
- Save the settings and exit the BIOS.
Step 5: Install macOS Ventura on Your PC/Laptop
-
- Boot from the USB Installer:
-
- Plug the USB drive into your PC and restart.
-
- Select the USB drive as the boot option in the BIOS boot menu.
-
- Boot from the USB Installer:
-
- Open the macOS Installer:
After a few minutes, you’ll see the macOS installer screen.-
- Select Disk Utility from the menu.
-
- Erase your hard drive and format it as APFS.
-
- Open the macOS Installer:
-
- Start the Installation:
-
- Choose the formatted drive as the installation location.
-
- Follow the on-screen instructions to complete the installation.
-
- Start the Installation:
Note: This process might take 30-45 minutes, depending on your system. Your PC may reboot a few times during installation.
Step 6: Post-Installation Setup
Once macOS is installed, you’ll need to fine-tune a few things for everything to work perfectly.
-
- Install OpenCore to Your Hard Drive:
-
- You need OpenCore on your hard drive for macOS to boot without the USB drive.
-
- Use the same process as before: copy the EFI folder to your hard drive’s EFI partition.
-
- Install OpenCore to Your Hard Drive:
-
- Install Drivers (Kexts):
-
- Install essential drivers or kexts (like network or audio drivers) to make your PC fully functional.
-
- Popular tools like Kext Utility can help you install them easily.
-
- Install Drivers (Kexts):
-
- Fix Graphics and Sound Issues:
-
- If your screen resolution or sound isn’t working properly, you may need additional tweaks.
-
- Use OpenCore Configurator to edit your config file again if necessary.
-
- Fix Graphics and Sound Issues:
Troubleshooting Tips
-
- Stuck at the Apple Logo?
-
- Check your BIOS settings again.
-
- Make sure the config.plist file is correctly configured.
-
- Stuck at the Apple Logo?
-
- Wi-Fi or Bluetooth Not Working?
-
- Install the correct network drivers (kexts) from the Hackintosh community forums.
-
- Wi-Fi or Bluetooth Not Working?
-
- Can’t Boot Without the USB?
-
- Double-check if OpenCore is properly installed on your hard drive’s EFI partition.
-
- Can’t Boot Without the USB?
-
- Kernel Panic or Random Crashes?
Reconfigure your bootloader settings. Sometimes, tweaking settings like the SMBIOS profile can solve such issues.
Step 7: Enjoy macOS 13 on Your PC/Laptop
Congratulations! You’ve successfully installed macOS 13 Ventura on your PC or laptop. Now, you can enjoy the sleek design and smooth performance of macOS without buying an expensive Mac. Keep in mind that Hackintosh systems aren’t perfect. Some features like AirDrop or iMessage might not work due to Apple’s restrictions. But with the right tweaks, you can get most of the macOS experience up and running.
Final Thoughts
Installing macOS on a non-Apple computer is challenging but rewarding. You get the look and feel of macOS on your custom hardware setup. Whether you’re doing it for fun, software development, or just to try something new, this guide should help you get started.
Remember: Hackintoshing isn’t always smooth sailing. You might run into issues, but online communities like r/Hackintosh on Reddit or tonymacx86 forums can be a great place to find help.
FAQs
Q1: Is installing macOS on a PC legal?
Technically, Apple’s license restricts macOS to Apple hardware. However, as long as you don’t use it for commercial purposes, many people use Hackintosh as a personal project.
Q2: Can I update macOS on a Hackintosh?
Yes, but be cautious. Always check the forums before updating, as new versions can break compatibility with your setup.
Q3: Can I dual-boot macOS and Windows?
Yes! Many users dual-boot both systems by partitioning their hard drives or using multiple drives.

