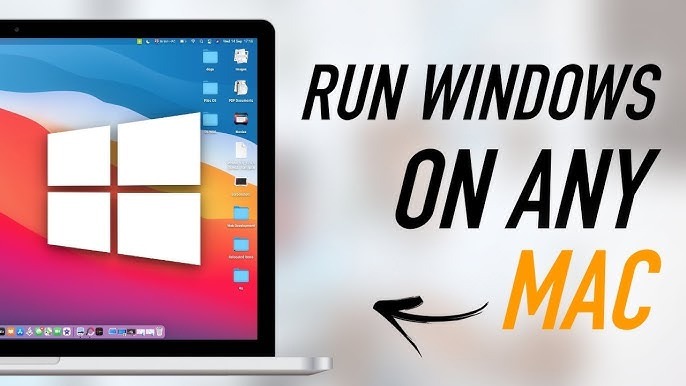
If you’ve ever wanted to run Windows on your Mac, you’re not alone. Many users have found themselves needing to use software or applications that are only available on Windows. Whether it’s for work, gaming, or just to experience another operating system, running Windows on a Mac can be incredibly useful. In this guide, we’ll walk you through the steps to get Windows up and running on your Mac, using easy-to-follow methods.
Table of Contents
ToggleWhy Run Windows on a Mac?
Before we dive into the “how,” let’s briefly touch on the “why.” There are several reasons why you might want to run Windows on your Mac:
- Software Compatibility: Some software applications are only available on Windows. Running Windows on your Mac allows you to access these programs without needing a separate PC.
- Gaming: Windows is the preferred platform for many games. Running Windows can give you access to a broader range of games and potentially better performance.
- Testing and Development: Developers might need to test applications in different operating environments. Running Windows on a Mac can streamline this process.
- Business Needs: Certain business tools and software might only be available for Windows. Running Windows on your Mac ensures you have access to all the tools you need for work.
Method 1: Using Boot Camp
Boot Camp is a utility provided by Apple that allows you to install and run Windows on your Mac. Here’s how to set it up:
Step 1: Check Compatibility
Before starting, ensure your Mac meets the system requirements for both macOS and Windows. You’ll also need a valid Windows installation ISO file or DVD.
Step 2: Backup Your Data
It’s always a good idea to back up your data before making significant changes to your system. Use Time Machine or another backup method to secure your files.
Step 3: Open Boot Camp Assistant
- Launch Boot Camp Assistant: Go to Applications > Utilities > Boot Camp Assistant.
- Create a Windows Partition: Follow the on-screen instructions to create a partition for Windows. This involves allocating space on your Mac’s hard drive for the Windows installation.
Step 4: Install Windows
- Insert Windows Installation Media: If you’re using a DVD, insert it into your Mac’s drive. If you’re using an ISO file, you’ll need to create a bootable USB drive.
- Follow Installation Prompts: Boot Camp Assistant will guide you through the process of installing Windows. You’ll need to select your partition and follow the Windows installation prompts.
- Install Boot Camp Drivers: Once Windows is installed, Boot Camp will prompt you to install drivers necessary for your Mac’s hardware to work correctly with Windows. Follow the instructions to complete this step.
Step 5: Switching Between macOS and Windows
To switch between macOS and Windows, simply restart your Mac and hold the Option key during startup. You’ll be able to choose which operating system to boot into.
Method 2: Using Virtualization Software
If you prefer not to reboot your Mac every time you need to switch between operating systems, you can use virtualization software. Virtual machines (VMs) let you run Windows inside macOS, allowing you to switch between the two without restarting.
Popular Virtualization Software
- Parallels Desktop: One of the most popular choices for running Windows on a Mac. It offers excellent performance and integration with macOS.
- VMware Fusion: Another strong contender that provides robust features and good performance.
- VirtualBox: A free, open-source option. It’s a bit less user-friendly but still effective.
Step 1: Download and Install Virtualization Software
- Download: Go to the website of the virtualization software you’ve chosen and download the installer.
- Install: Open the downloaded file and follow the on-screen instructions to install the software.
Step 2: Create a New Virtual Machine
- Open the Software: Launch your virtualization software.
- Create New VM: Look for an option to create a new virtual machine. Follow the prompts to set up a new VM, allocating resources such as memory and storage.
Step 3: Install Windows
- Insert Windows Installation Media: If you’re using an ISO file, you’ll need to point the VM to it. If you’re using a DVD, you’ll need to insert it into your Mac’s drive.
- Follow Installation Prompts: The VM will boot from the Windows installation media, and you can proceed with the Windows setup just as you would on a physical PC.
- Install Guest Additions/Tools: Most virtualization software will include additional tools or drivers that improve integration between Windows and macOS. Make sure to install these for the best experience.
Step 4: Run Windows Applications Once Windows is installed, you can run it just like you would on a PC. You can even run Windows applications alongside your macOS applications, depending on the software you’re using.
Tips for Running Windows on a Mac
- Performance: Running Windows in a virtual machine requires a fair amount of system resources. Ensure your Mac has enough RAM and storage to handle both operating systems simultaneously.
- Software Updates: Keep both macOS and Windows up to date to ensure compatibility and security. Regular updates can prevent issues and improve performance.
- Backup Regularly: If you’re using Boot Camp, remember that your Windows installation is separate from macOS. Regular backups of both operating systems can protect your data in case of hardware failure or other issues.
- Security: Running two operating systems means you need to be aware of security for both. Make sure you have antivirus software installed and follow best practices for securing both macOS and Windows.
Troubleshooting Common Issues
1. Boot Camp Assistant Not Opening
Ensure that your macOS is up to date. Sometimes, Boot Camp issues can be resolved by installing the latest macOS updates.
2. Windows Not Booting
If Windows isn’t booting, check the partition settings in Boot Camp. You might need to reconfigure the partition or reinstall Windows.
3. Virtual Machine Performance Issues
If your virtual machine is running slowly, consider allocating more resources (RAM, CPU) in the virtualization software settings. Also, ensure that your Mac has sufficient resources available.
Conclusion
Running Windows on a Mac can greatly expand your options and provide access to software and features that might not be available on macOS. Whether you choose to use Boot Camp for a full installation or virtualization software for a more flexible approach, you can easily set up a dual-boot or virtual environment to meet your needs.